About This Blog

Showing posts with label DIY. Show all posts

Thursday, October 4, 2012

Wonder How To Make Bread Beads?


 We had so much fun making these little beads. I invited my family over, we all sat down and got a bit messy. I loosely used this recipe.


 We added colors with both tempera and acrylic paint. I didn't notice a difference in the texture of the dried beads.


Then we grabbed some random tools that we found in the junk drawer and started cutting out beads.
We let the cut beads dry for a bit and then made small holes in the middle so we could string them.
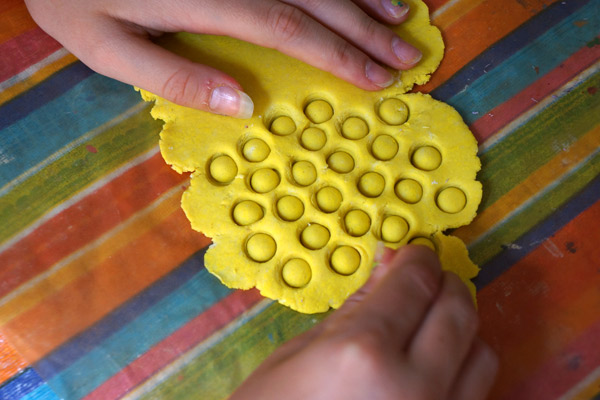


Finally we let them dry overnight.


After we strung them I added a layer of Mod Podge to some to make them a bit shiny.
Our little bead making party was so fun! I can't wait for the next crafty party.
xo,
cherish

Tuesday, December 20, 2011

DIY Christmas Stars


I was inspired by a star I found on Pinterest.  I tracked the tutorial to this beautiful website grey luster girl.  My mom and daughter created the stars out of a random star template. They just drew a star then cut it out of card stock. We only made one sided stars.
 Then I spray painted them with sparkley glitter.


 We used the stars to decorate. They turned out really beautiful and were so easy to make.


This is a great last minute decoration to use on gifts too! I hope your December is going wonderfully.
xo, 
c.f.

Thursday, December 8, 2011

Wonderful Gift DIY

This is a super easy and SUPER melt in your mouth DIY. All you need is:

To avoid a funky color we separated the chips.


My boy helped me here.


My sister poured the melted chocolatey goodness on a parchment lined cookie sheet. Then sprinkle on the crushed candy canes.


Refridgerate for 30 minutes, you can "check" on it and chip off the edges to clean it up. :)
Eat, share, package and give as gifts! 
 Cute and easy. This will bring smiles out everywhere. Check out the awesome star adorning the gift. Yes, another easy peasy DIY coming soon! 
I hope your holiday season is off to a great start.
xo,
c.f.


Sunday, October 2, 2011

DIY mini envelopes

 Tools needed: Pretty paper, Mod Podge, Sparkle Tape or other stickers, glue, paint brush and scissors.

 This stencil is for the inside of the  envelope.
 cut out envelopes and liners with pretty paper and scraps.


have fun sending sweet little messages
. xo,
c.f.

Wednesday, September 28, 2011

Coming soon DIY Mini envelopes

Super cute and fun DIY mini envelopes.  Hopefully by the end of the week I will have the tutorial finished. I love to slip these little notes into my loved ones lunch boxes and backpacks. They also look super on gifts. Be back soon! I hope you are having a great week.
xo,
c.f.

Monday, September 19, 2011

DIY Bookcover

credit: Pugley Pixel template

Here is a great way to re purpose a paper bag. We made a book cover old school style for my daughters school book, then added duct tape to modernize it. Here's how:

1. Supplies: paper bag, scissors, book, duct tape, and ruler.
2. Cut down one side of bag then cut bottom out.
  •  Lay bag flat with logo facing inside ( if you do not want logo to show).
  •  Put book in the middle of bag. Fold the top down and make a crease at top of book.
  •  Repeat for bottom.
  • Take book off and fold top and bottom flaps at crease.
  • Put book back in center of paper, it should fit nicely lengthwise.
  • Fold left side of paper over book to cover the front of book. 
  • Fold again at the edge of the book.
  • Slide the hard cover page of the book inside the folded cover.
  • Repeat on back side.
3. Tape edges of paper bag closed so the bag doesn't open up.
4. Use duct tape to decorate the outside, get creative!
Have Fun!
xo, c.f.